Leads
General rules of thumb:
- plays musical motifs
- is monophonic
- takes up the high-mid frequencies
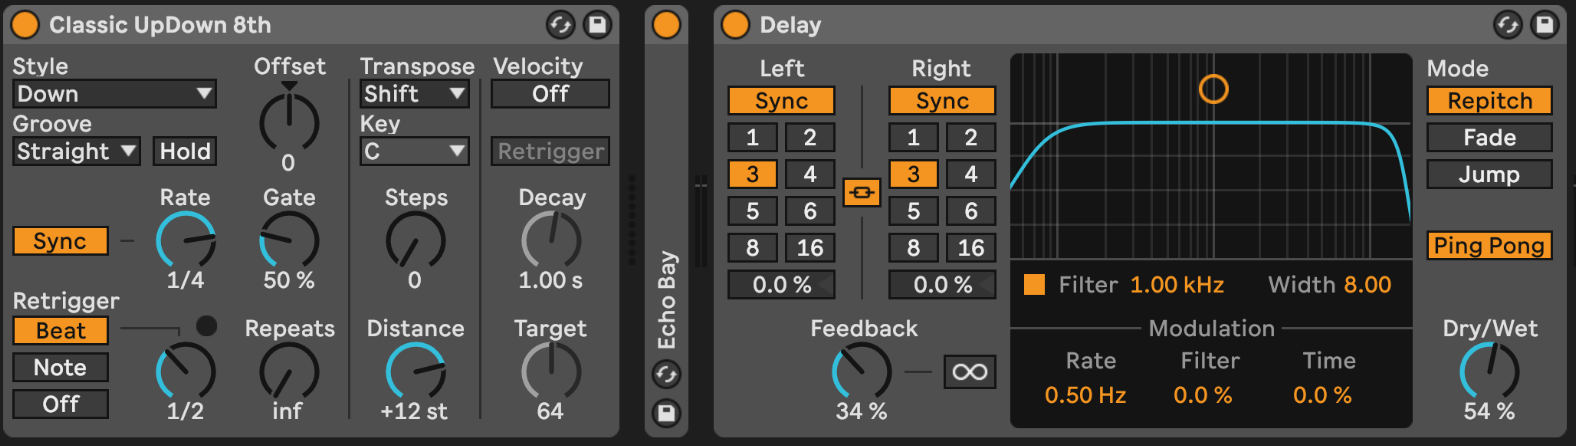
Arpeggiator & Delay
A nice way to add a bit of character, to a lead is by using a Arpeggiator and gluing the sound back together with some Delay.
Layering
Now that we have one good sounding lead, we can add more to musical "actors". Think of it like in a band, you usually have one main singer and then some backing singers supporting the main. This is what we want to create:
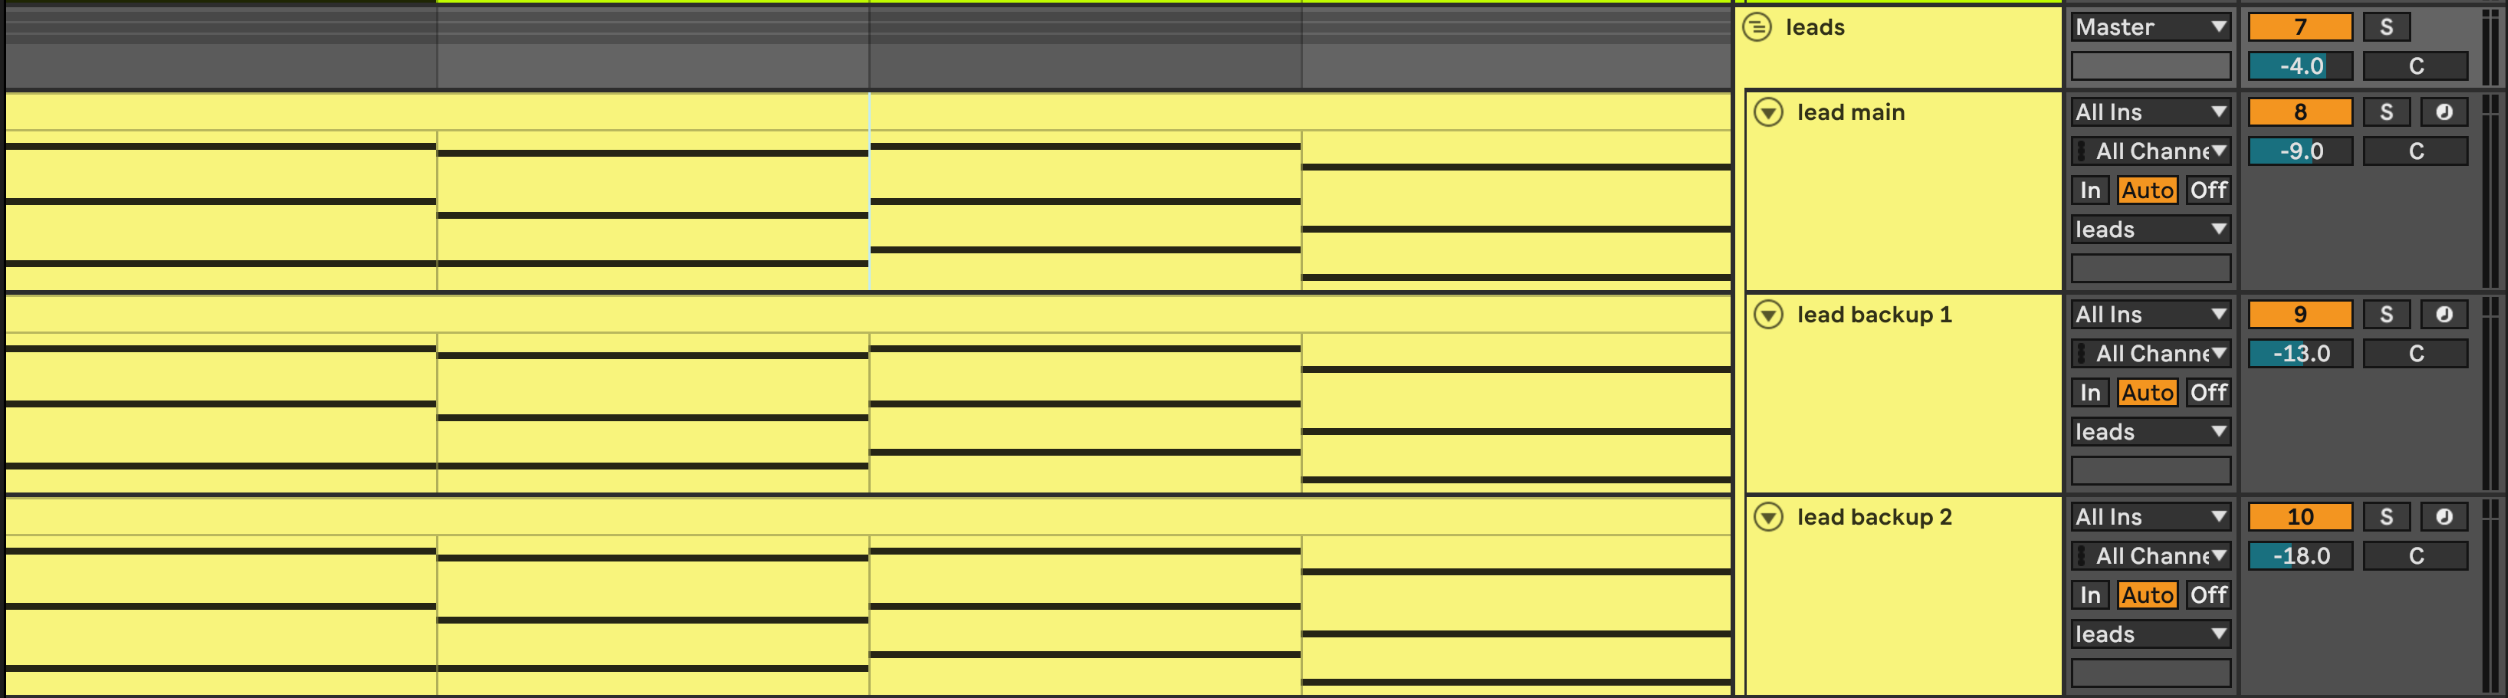
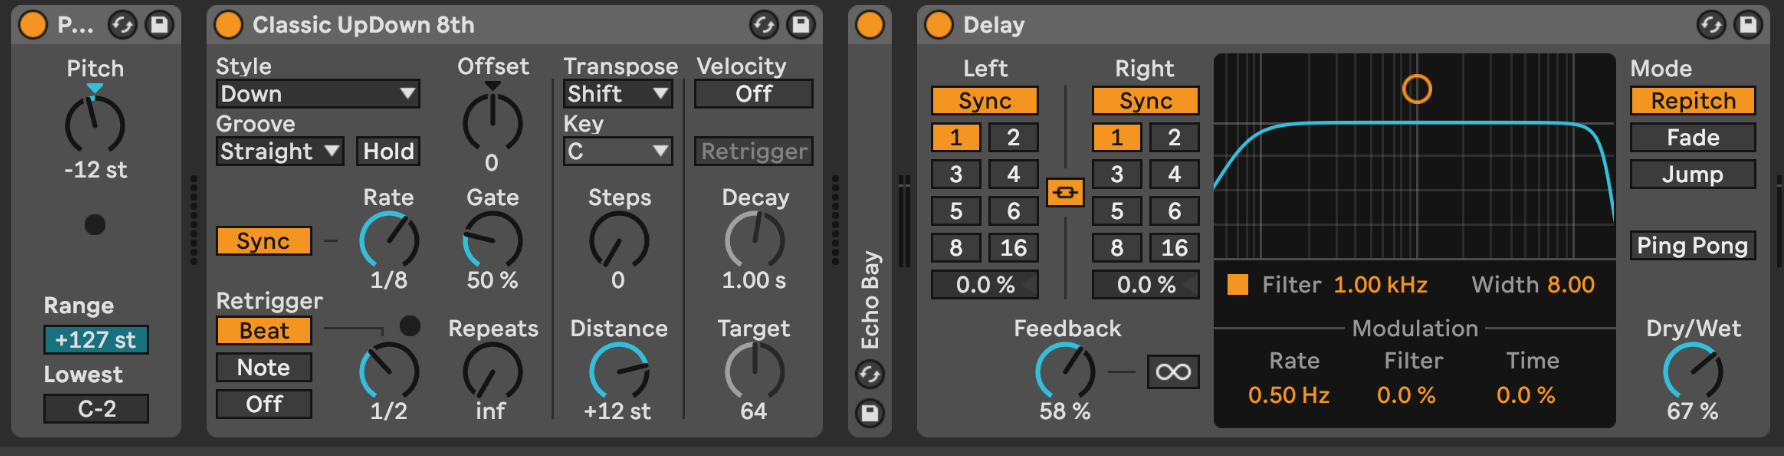
You can quite easily do this by copying the main lead and then adjusting with all the available parameters, like: delay dry/wet, delay feedback, arpeggiator rate, pitching the sound down a chord, adjusting the volume etc.
Lead Main

Lead Backup 1
Lead Backup 2

EQ
The sound is a bit too chaotic now, so we use the equalizer, Ableton Live's EQ8, to cut unwanted low frequencies away and make it cleaner. This is basically a step of Mixing, but it's not a bad idea to already do this now.
You can use the equalizer, only use the first node and use the shape as below. For leads, you can start around 250Hz and then play around that area, filter away too much and then go back until the character of the sound is back again.

Don't overdue this, it will make your sound thin!
Relevant Note(s):